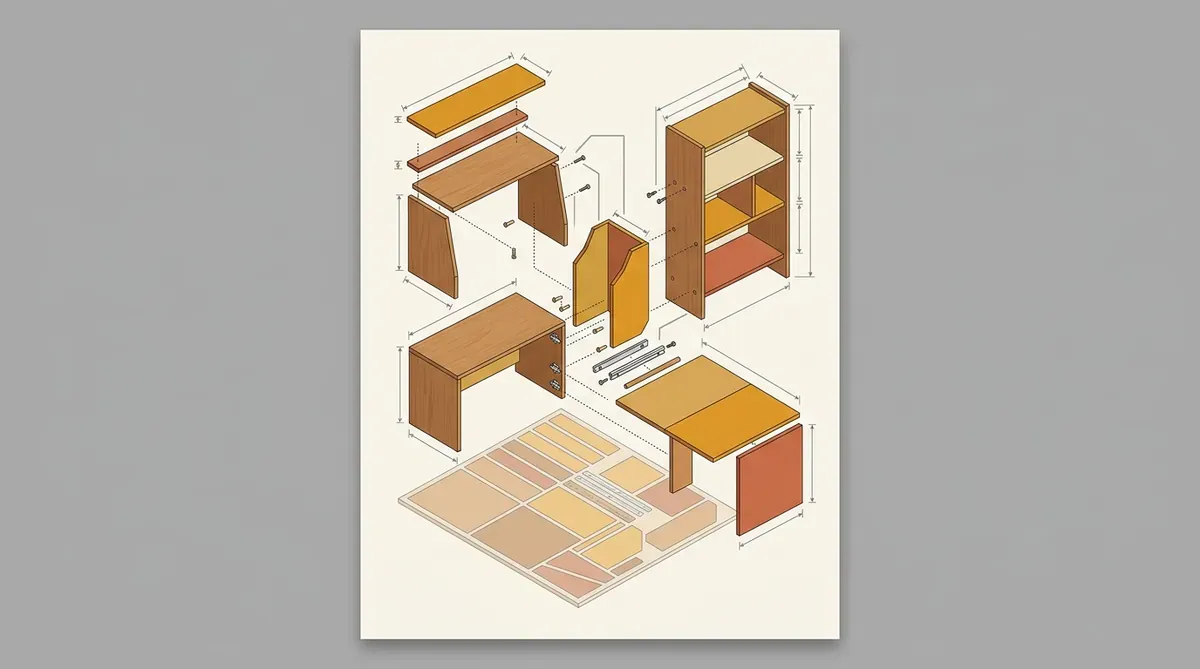
Planos Mueble Multifuncional
Descripción
Planos detallados en PDF con medidas, materiales y guía de ensamblaje para construir tu propio mueble multifuncional. Nivel: principiante a intermedio.
Este producto aún no tiene un enlace de compra configurado.
Portal de Clientes (Odoo)
El procesamiento de pago, facturación y la gestión de tus descargas se realizan en nuestro espacio seguro de Odoo.
🔑 ¿Ya lo adquiriste? Inicia sesión aquí para descargarlo →Detalles Técnicos del Diseño
Estos planos constructivos detallan paso a paso la fabricación de un mueble modular optimizado para espacios reducidos (< 40m²). El mueble funciona como escritorio de trabajo, estantería de almacenamiento y mesa auxiliar expandible.
- Dificultad: Intermedio (requiere sierra de mesa y ruteadora/fresadora).
- Material Sugerido: 1.5 láminas de MDF o Triplex de 18mm con acabado sellador.
- Tiempo Estimado: 12 a 16 horas de taller.
- Dimensiones Totales: 120cm (ancho) x 45cm (profundidad) x 180cm (alto).
| Especificación | Detalle Técnico |
|---|---|
| Ensambles | Tornillos ocultos (Pocket Hole) y espigas de madera |
| Herraje Clave | Rieles telescópicos de servicio pesado de 450mm |
| Margen de Tolerancia | +/- 0.5 mm en todos los cortes rectos |
Contenido del Paquete de Descarga
Al adquirir este recurso tendrás acceso a un archivo comprimido (.ZIP) que contiene el siguiente material profesional:
- Planos Constructivos en PDF: Documento de 12 páginas a escala con cotas detalladas en milímetros.
- Guía de Despiece y Optimización de Cortes: Mapa de cortes para optimizar el material sobre las láminas de 1.83m x 2.44m, minimizando el desperdicio.
- Modelo 3D Paramétrico (.DXF / .STEP): Archivos listos para corte computarizado (CNC) o ruteadora digital.
- Listado Completo de Compra (BOM): Lista de herrajes, tornillos, cantos y pegamentos necesarios.
Recomendaciones y Pasos para la Fabricación
Sigue este flujo de trabajo recomendado para obtener el mejor acabado en tu mueble modular:
1. Preparación y Corte
- Imprime la guía de despiece y llévala a tu distribuidor de confianza para pre-cortar las piezas principales si no cuentas con sierra de banco profesional.
- Si usas ruteadora CNC, importa el archivo
.DXFaplicando un offset de herramienta de 3mm según la fresa de corte elegida.
2. Perforaciones de Ensamble
- Marca y realiza las perforaciones ocultas usando una plantilla de bolsillo (Kreg Jig o similar) a 2 pulgadas de los bordes.
- Utiliza pegamento de madera de alta resistencia (Titebond II o similar) antes de realizar el ajuste de tornillos.
3. Acabados y Lijado
- Lija todas las caras utilizando granos progresivos: #120 para imperfecciones, #180 para suavizar y #240 previo a la aplicación del sellador.
- Se recomienda aplicar al menos 3 capas de laca catalizada o poliuretano base agua para proteger las superficies de trabajo.